Cutting Chair Rail Corners - How To Install A Chair Rail Molding Diy Family Handyman : Miter corners, especially interior corners first, then measure at the height where the chair rail goes.. Watch as the #verycoolguys of construction show you how to install chair rail, in a proper molding installation.today we show you, step by step, how to insta. The general rule is that the chair rail should be about 1/3 of the way up from the floor (between 32 and 36 for an 8' ceiling). Measure the wall according to the length to determine how many lengths of chair rail molding will be needed. Cut chair rail with coping saw. Lay it on the square edge and mark the other side onto the wood.
It means a corner that juts out into a room, as on the edge of a chimney or cabinet. Line up the end of the chair rail with the miter box so that you cut it at a 90 degree angle. You can also use a miter saw for cutting the rails. Cut a 45 degree angle on the end of the molding that needs the dead end or end cap. Divide it and cut the new, correct angle.
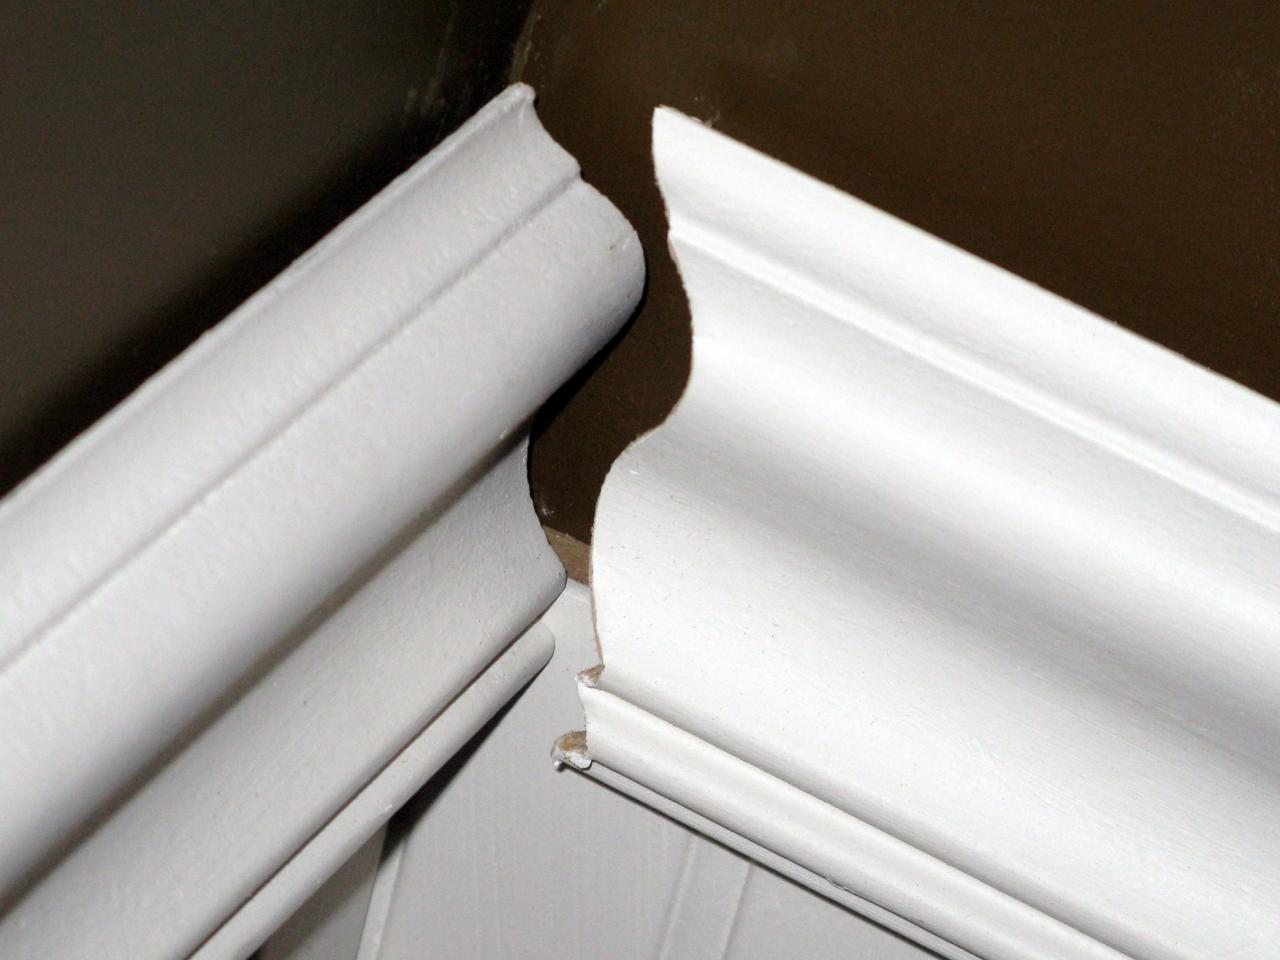
Step By Step Tips For Installing Chair Rail And Wainscoting On A Variation Of Walls Stairs Diy Wainscoting House Design Wainscoting from i.pinimg.com Cut a 45 degree angle on the end of the molding that needs the dead end or end cap. How to cut chair rail molding for a 45deg. Set the first piece of chair rail on the saw platform, with the piece standing on its bottom edge (the way it will go on the wall), with the angle making the front of the trim shorter than the back. The general rule is that the chair rail should be about 1/3 of the way up from the floor (between 32 and 36 for an 8' ceiling). It is used as an aesthetic addition to a room, or as a functional piece of woodwork that stops chairs from sliding into the wall. Cope the end to meet another piece of trim if you are instead completing an inside. For purposes of trim molding installation, an outside corner'' doesn't mean a corner that's outdoors. Now use a speed square to determine what the angle actually is.
Outside corners often flare out slightly, so that the chair rail needs to be cut at more than 45 degrees.
Installing chair rail molding on an angled cut so it will fit in a corner sounds like a complicated task, but it really isn't. Accurate measurements are a key to success. For purposes of trim molding installation, an outside corner'' doesn't mean a corner that's outdoors. To determine the height of the chair rail, measure the height of the ceiling and divide it by three. Chair rail isn't just for the dining room anymore! Cut chair rail with coping saw. You will need to take separate measurements for each. A piece of lattice was run along that side of the bookcase to fill that gap you see above). These steps are for molding that sits flat against a wall, like chair rail, picture, rail, shoe or quarter round, and baseboards. The inside corner cuts on your chair rail must be made different than the outside corner cuts. Set the chair rail inside the miter box and line up properly to the needed angle. Now use a speed square to determine what the angle actually is. Saw through the edge of the chair rail.
You will need to take separate measurements for each. Coped molding gives the tightest fit, best a. How to cut chair rail molding for a 45deg. Cut a 45 degree angle on the end of the molding that needs the dead end or end cap. Decide exactly how high you want your chair rail to be on the wall and then mark that point all the way around the room.
Installing Chair Rail Trim from www.aconcordcarpenter.com Cutting an end cap for crown molding is more complicated. A piece of lattice was run along that side of the bookcase to fill that gap you see above). Chair rail molding is place on a wall about the height of a chair back and was originally designed to protect the wall from that chair back. To determine the height of the chair rail, measure the height of the ceiling and divide it by three. Inside corners require coped joints. Line up the end of the chair rail with the miter box so that you cut it at a 90 degree angle. Walls are not always exactly plumb or square. Look at the cuts on other trim in your house and you will see how the trim fits where it is cut at the corners.
Coped molding gives the tightest fit, best a.
How to cut chair rails at angles. Measure the length of the chair rail carefully. The back side of the molding should be shorter than the front. Now transfer this to a piece of wood with a square edge. To determine the height of the chair rail, measure the height of the ceiling and divide it by three. Insert the rail into the miter box with its front face touching the back of the miter box. Divide it and cut the new, correct angle. The proper miter angle to cut for a moulding where it wraps around or through a square (90 degeree) corner is 45 degrees. Coped molding gives the tightest fit, best a. These steps are for molding that sits flat against a wall, like chair rail, picture, rail, shoe or quarter round, and baseboards. Lay it on the square edge and mark the other side onto the wood. Now use a speed square to determine what the angle actually is. The same techniques work for crown molding and base molding, as well.
Cut the chair rail end to the specified angle. Otherwise, cut a piece of chair rail about an inch long and mitered, then miter the end of the longer piece and glue them together to make a return. Set the chair rail inside the miter box and line up properly to the needed angle. Decide exactly how high you want your chair rail to be on the wall and then mark that point all the way around the room. Line up the end of the chair rail with the miter box so that you cut it at a 90 degree angle.
Beadboard Chair Rail Dream Home Design from hgtvhome.sndimg.com Cut a 45 degree angle on the end of the molding that needs the dead end or end cap. How to cut chair rails at angles. Chair rail is a type of molding. Accurate measurements are a key to success. Set your miter at the correct angle. Chair rail isn't just for the dining room anymore! Learn a quick and easy way to make your end caps for a chair rail.check out our wall boxes tutorial: You will need to take separate measurements for each.
In a house than outside corners so there are fewer angles to do anything with except dropping the saw into a detent and cut.
Outside corners of crown molding, chair and picture rails, and baseboards require outside miters. Set the chair rail inside the miter box and line up properly to the needed angle. To determine the height of the chair rail, measure the height of the ceiling and divide it by three. Cutting the inner corner of the rail. Put trim around your door, and then but the chair rail into the door trim. If it sticks up above the door trim any, miter the end a little. Use a stud finder and mark off where the studs are so you know where to nail in the trim. This cut can be made with a miter saw. Insert the rail into the miter box with its front face touching the back of the miter box. The same techniques work for crown molding and base molding, as well. Set your miter at the correct angle. Now use a speed square to determine what the angle actually is. The inside corner cuts on your chair rail must be made different than the outside corner cuts.